Introduction
A Campaign Model in Talqui serves as the blueprint for the content that will be delivered to recipients through a campaign. Unlike the campaign itself, which manages the lifecycle and scheduling of messages, the Campaign Model focuses solely on the message content. It allows businesses to define reusable templates that can be personalized with dynamic variables such as a recipient's name, address, or other custom data fields. This approach ensures both consistency in messaging and the ability to tailor content for each recipient.
The Campaign Model is an essential component of Talqui’s omni-channel messaging system. Before any message dispatches, whether single sends or bulk sends, a Campaign Model must be defined and approved for use.
In certain platforms, like the WhatsApp API Official, the message template must be pre-approved by the platform provider (e.g., Facebook) to ensure compliance with anti-spam and content policies. This approval process can take up to 72 hours, so it’s crucial to plan ahead. Once the Campaign Model is approved, it can be reused for various campaigns and dispatches, ensuring consistency in messaging while still allowing for personalization through the use of variables.
Step-by-Step Guide for Creating a Campaign Model
Step 1: Define the Campaign Model Title
The first step in creating a Campaign Model is to define its title. This title is for internal use only and will not be visible to the recipients. Choose a descriptive title that makes it easy to identify the Campaign Model based on its content and purpose.
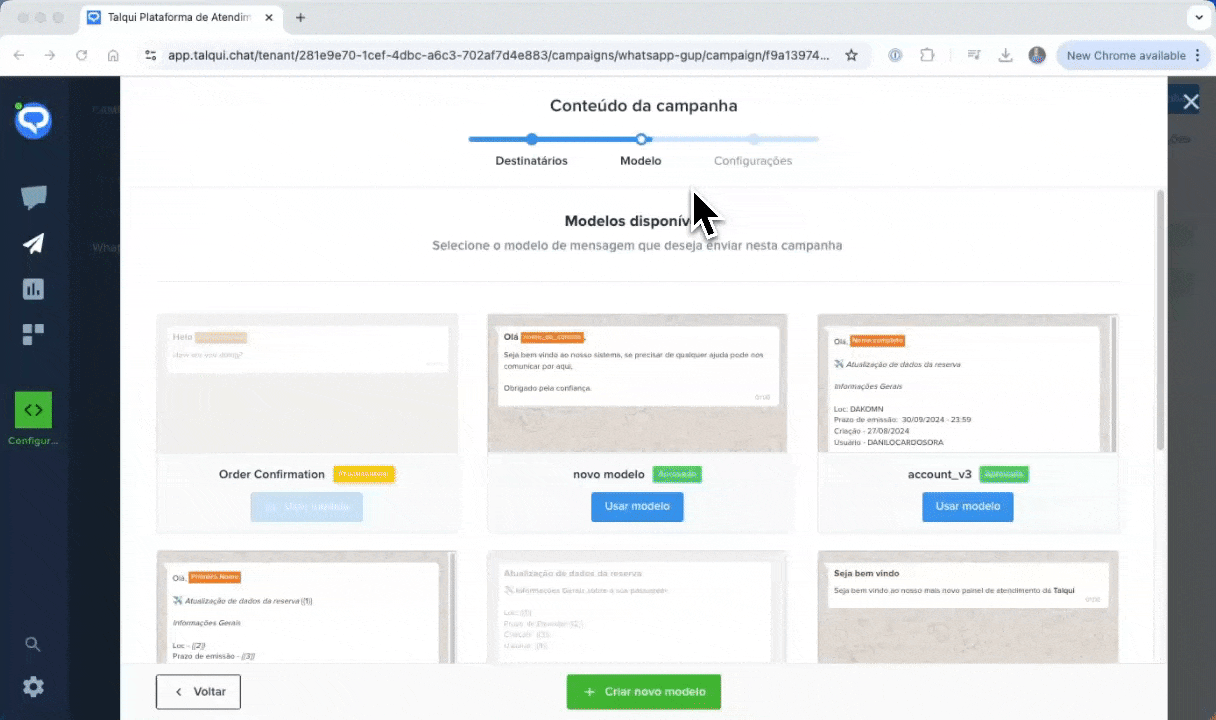
- Navigate to campaign creation process and then advance until step of content selecion (Campaign Models).
- Click on Create New Model button located at the botton-center.
- Enter a title for the Campaign Model that reflects its purpose (e.g., "Order Confirmation", "Promo Offer", etc.).
Step 2: Select the Type of Content
Next, you need to select the type of content that will be included in the Campaign Model. Talqui provides three main types of message content:
- Marketing Content: Used for promotional messages.
- Utility Content: Used for service-related updates, alerts, or information relevant to a specific customer transaction.
- OTP Verification: Used for sending one-time passwords (OTP) for verification purposes.
It’s important to choose the content type that matches the actual message to avoid rejection from Talqui or the platform provider.
Step 3: Compose the Message and Insert Variables
In this step, you will compose the body of the message. Talqui allows you to use variables within the message to personalize it. Variables can be placeholders for specific information, such as the recipient's name, order number, or other dynamic data.
- In the message editor, compose your message and insert any necessary variables clicking at button ( + Variable ).
- Use variables to personalize the message (e.g., "Hello {{ name }}, your order {{ order_number }} has been shipped.").
- If needed, you can also define a header for the message, which can include text, images, videos, or documents, depending on the communication platform.
- Similarly, you can add a footer if supported by the platform being used.
Step 4: Submit for Approval
Once the message is composed and all variables are in place, the next step is to submit the Campaign Model for approval (if required by the platform). For example, the WhatsApp API Official requires message templates to be pre-approved by Facebook before they can be used.
- Review the message content and ensure all variables are correctly mapped.
- If the platform requires approval, submit the Campaign Model for review. This process may take up to 72 hours.
- Once approved, the Campaign Model can be used in any future campaigns or campaign dispatches.
Step 5: Finalize and Save the Campaign Model
Once your Campaign Model is approved, it will be available for use in the Talqui platform. You can now reference this model when setting up new campaigns or dispatches.
- Click Save to finalize the model.
- You can now use this model in any campaign and create a campaign dispatch.
This guide outlines the process of creating a reusable Campaign Model in Talqui. Once a Campaign Model is created, it can be used across different campaigns and dispatches, allowing businesses to maintain consistent messaging while still personalizing content for individual recipients.